How to Build Strength for Your Hiking Adventures

How to Build Strength for Your Hiking Adventures

An often-overlooked element of training for a hiking adventure is strength training.

Most of the advice that’s online about training for a hiking trip – including the Inca Trail or Salkantay Route to Machu Picchu or climbing Kilimanjaro – focuses on hiking to prepare. And of course, doing more of the activity you’ll be doing on your trip is important!

To have more energy and stamina for long days of hiking in a row, strength training, also called resistance training, is a key ingredient in your overall training plan.

 Check out my WEBINAR on this topic: replay available here!


Why should you do strength training to prepare for hiking adventures

Including strength training as you prepare for a multi-day hiking trip helps you in several ways:

  • Building stronger muscles helps your body be more durable and resilient, especially for multiple days of hiking.
  • Stronger muscles give you more power and improve your efficiency as you move throughout the day.
  • Being stronger reduces your risk of certain types of injuries too, such as strains and potentially sprains.

Strength training has been shown to reduce or stop muscle mass loss that can occur as we age.

For women in perimenopause and menopause (myself included!), changes in hormones impact our strength and muscle mass. Strength training can help offset those impacts.

Strength training, along with other weight-bearing exercise, also improves our bone density. This is especially important if have osteoporosis or osteopenia, or are at risk for it.

So if you want to keep doing hiking trips over the coming years – like I do –  strength training will help!


Key components of strength training for hiking

Strength training routines for hiking should incorporate all major muscle groups.  This includes legs (quadriceps, hamstrings, calves, glutes), core (abs and lower back), and upper body (back, chest, shoulders).

Do strength training for all muscle groups at least twice a week to achieve gains that make a difference. You can configure this many different ways, while allowing 48 hours in between strength sessions for each muscle group.

Here are some options:

  1. Full-body session 2x per week. A single workout that includes legs, core and upper body can be an efficient way to get this done. I usually do Monday and Thursday, and it takes me about 30 minutes per workout. Just pick two days with one or two days in between. Here’s a sample.
  2. Rotating which body parts you exercise throughout the week. Do one muscle group “chunk” per day and rotate to allow for the rest time. For example: Monday = legs; Tuesday = core; Wednesday = upper; Thursday = legs; Friday = core; Saturday = upper; Sunday = no strength training
  3. Paired sets with a day or two in between. Exercise two muscle groups per session that are spread over the week. Options to consider: Monday = upper + core; Wednesday = legs + core; Friday = upper + legs

You don’t have to spend hours at the gym to complete an effective strength training workout. In fact, the full body strength training workouts I’ve created for my clients are less than 30 minutes (not including warmup and post-session stretching).

I’m all about functionality and efficiency when it comes to strength training. To achieve that, I include many exercises that use multiple muscle groups (hello pushups!).

I also structure the workouts so while you’re resting one muscle group, you’re using another muscle group. A sequence of squats – seated twist – bent-over rows allows your legs to rest during the seated twist and rows before you go back to squats.

Now let’s get specific about what to actually do!

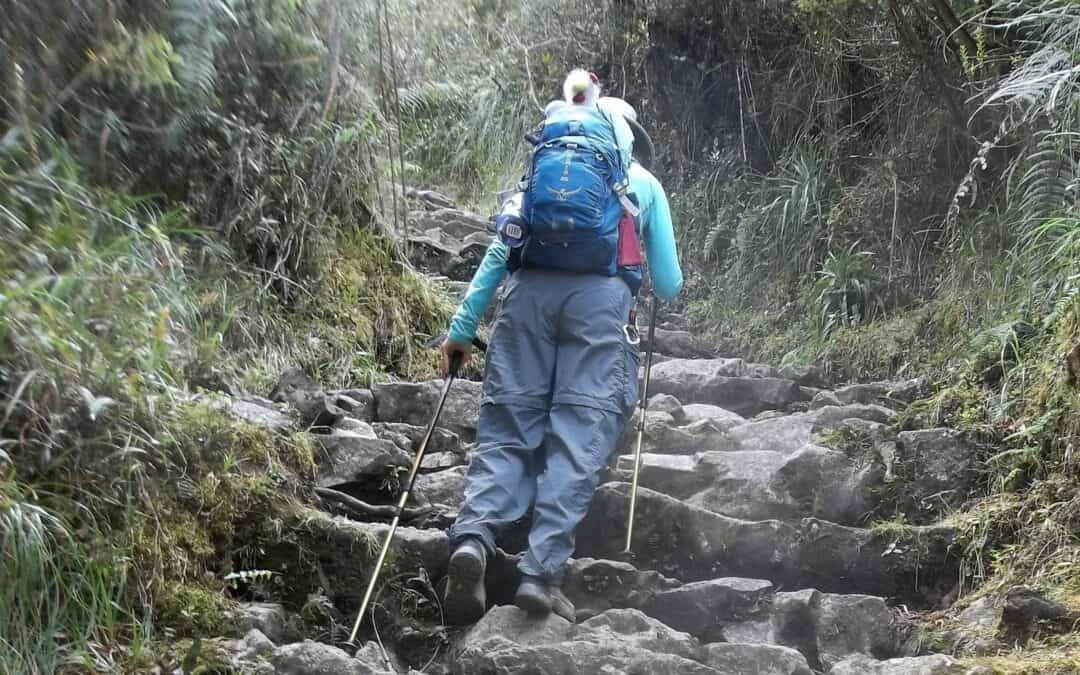
Leg strength for hiking

Some people think that the hiking they’re doing to get ready for their trip is enough to strengthen their legs. Yes, your legs will get stronger from doing that.

Doing specific resistance exercises where your legs work under additional load stimulate your muscles to get even stronger though. That’s why world champion runners do strength training! 

Even if you’re not aiming for a personal best speed record, the stronger your legs are, the better they’ll feel at the end of the day. Plus they’ll feel better the next day!

For leg strength, the classics are classics for good reason. Squats, lunges, deadlifts and calf raises get the job done. You can start with body weight, and add your pack with weight in it to challenge your muscles as your get stronger. You should have enough resistance (weight) that your legs feel fatigued when you get to abut 12 reps. Slowing down the movement is another way to add challenge!

I also include leg exercises that work in the lateral plane (side-to-side) in strength workouts. We spend so much time going forward that our muscles supporting lateral movements tend to be underdeveloped. When we go hiking on winding and rocky trails with more angled or side steps, those muscles fatigue quickly!

Here are some lateral leg exercises I like:

  • side steps with a stretchy loop band (above knees) or rope-style band with handles (rope under both feet)
  • side lunges
  • slide leg lift and hold – standing or lying on side
  • side step-ups

Core strength for hiking

Core strength is critical for pretty much all activities you might do on an adventure trip. If you’re hiking, you’ll be using your core for stabilizing your backpack and twisting as you take it off and put it on.

If you have low back issues, you may have been told to work on your core. This is because stronger core muscles provide better support and reduce fatigue for standing and sitting.

A few of my favorite core exercises include:

  • plank hold (on knees is fine, arms fully extended or on forearms)
  • seated twist 
  • side bends
  • bird dog

These simulate the bracing, twisting and bending you’ll inevitably be doing on your adventure trip. Building your strength and muscle memory for this in a controlled environment prepares your body for what’s to come.

Upper body strength for hiking

Be sure to include upper body muscles in your strength training routine. Hikers benefit from strong backs and shoulders for comfortably lifting and carrying their backpacks.

Also, if you use trekking poles (which I strongly recommend for many reasons), upper body strength will help you use them more efficiently.

Including a mix of pushing and pulling exercises sets you up for success.

Pushing exercises – pushups (of course), chest press, shoulder press

Pulling exercises – bent-over rows, upward rows and pull-ups

What to use for strength training 

At this point you might be wondering how much money you’ll need to invest in this strength training stuff. Weights, equipment, and gym memberships can be expensive. The good news is, you don’t have to drop a bunch of money on any of those if you can’t afford it or don’t want to!

You can use LOTS of different things that you probably already have on hand to build strength through resistance. Here are just a few ideas:

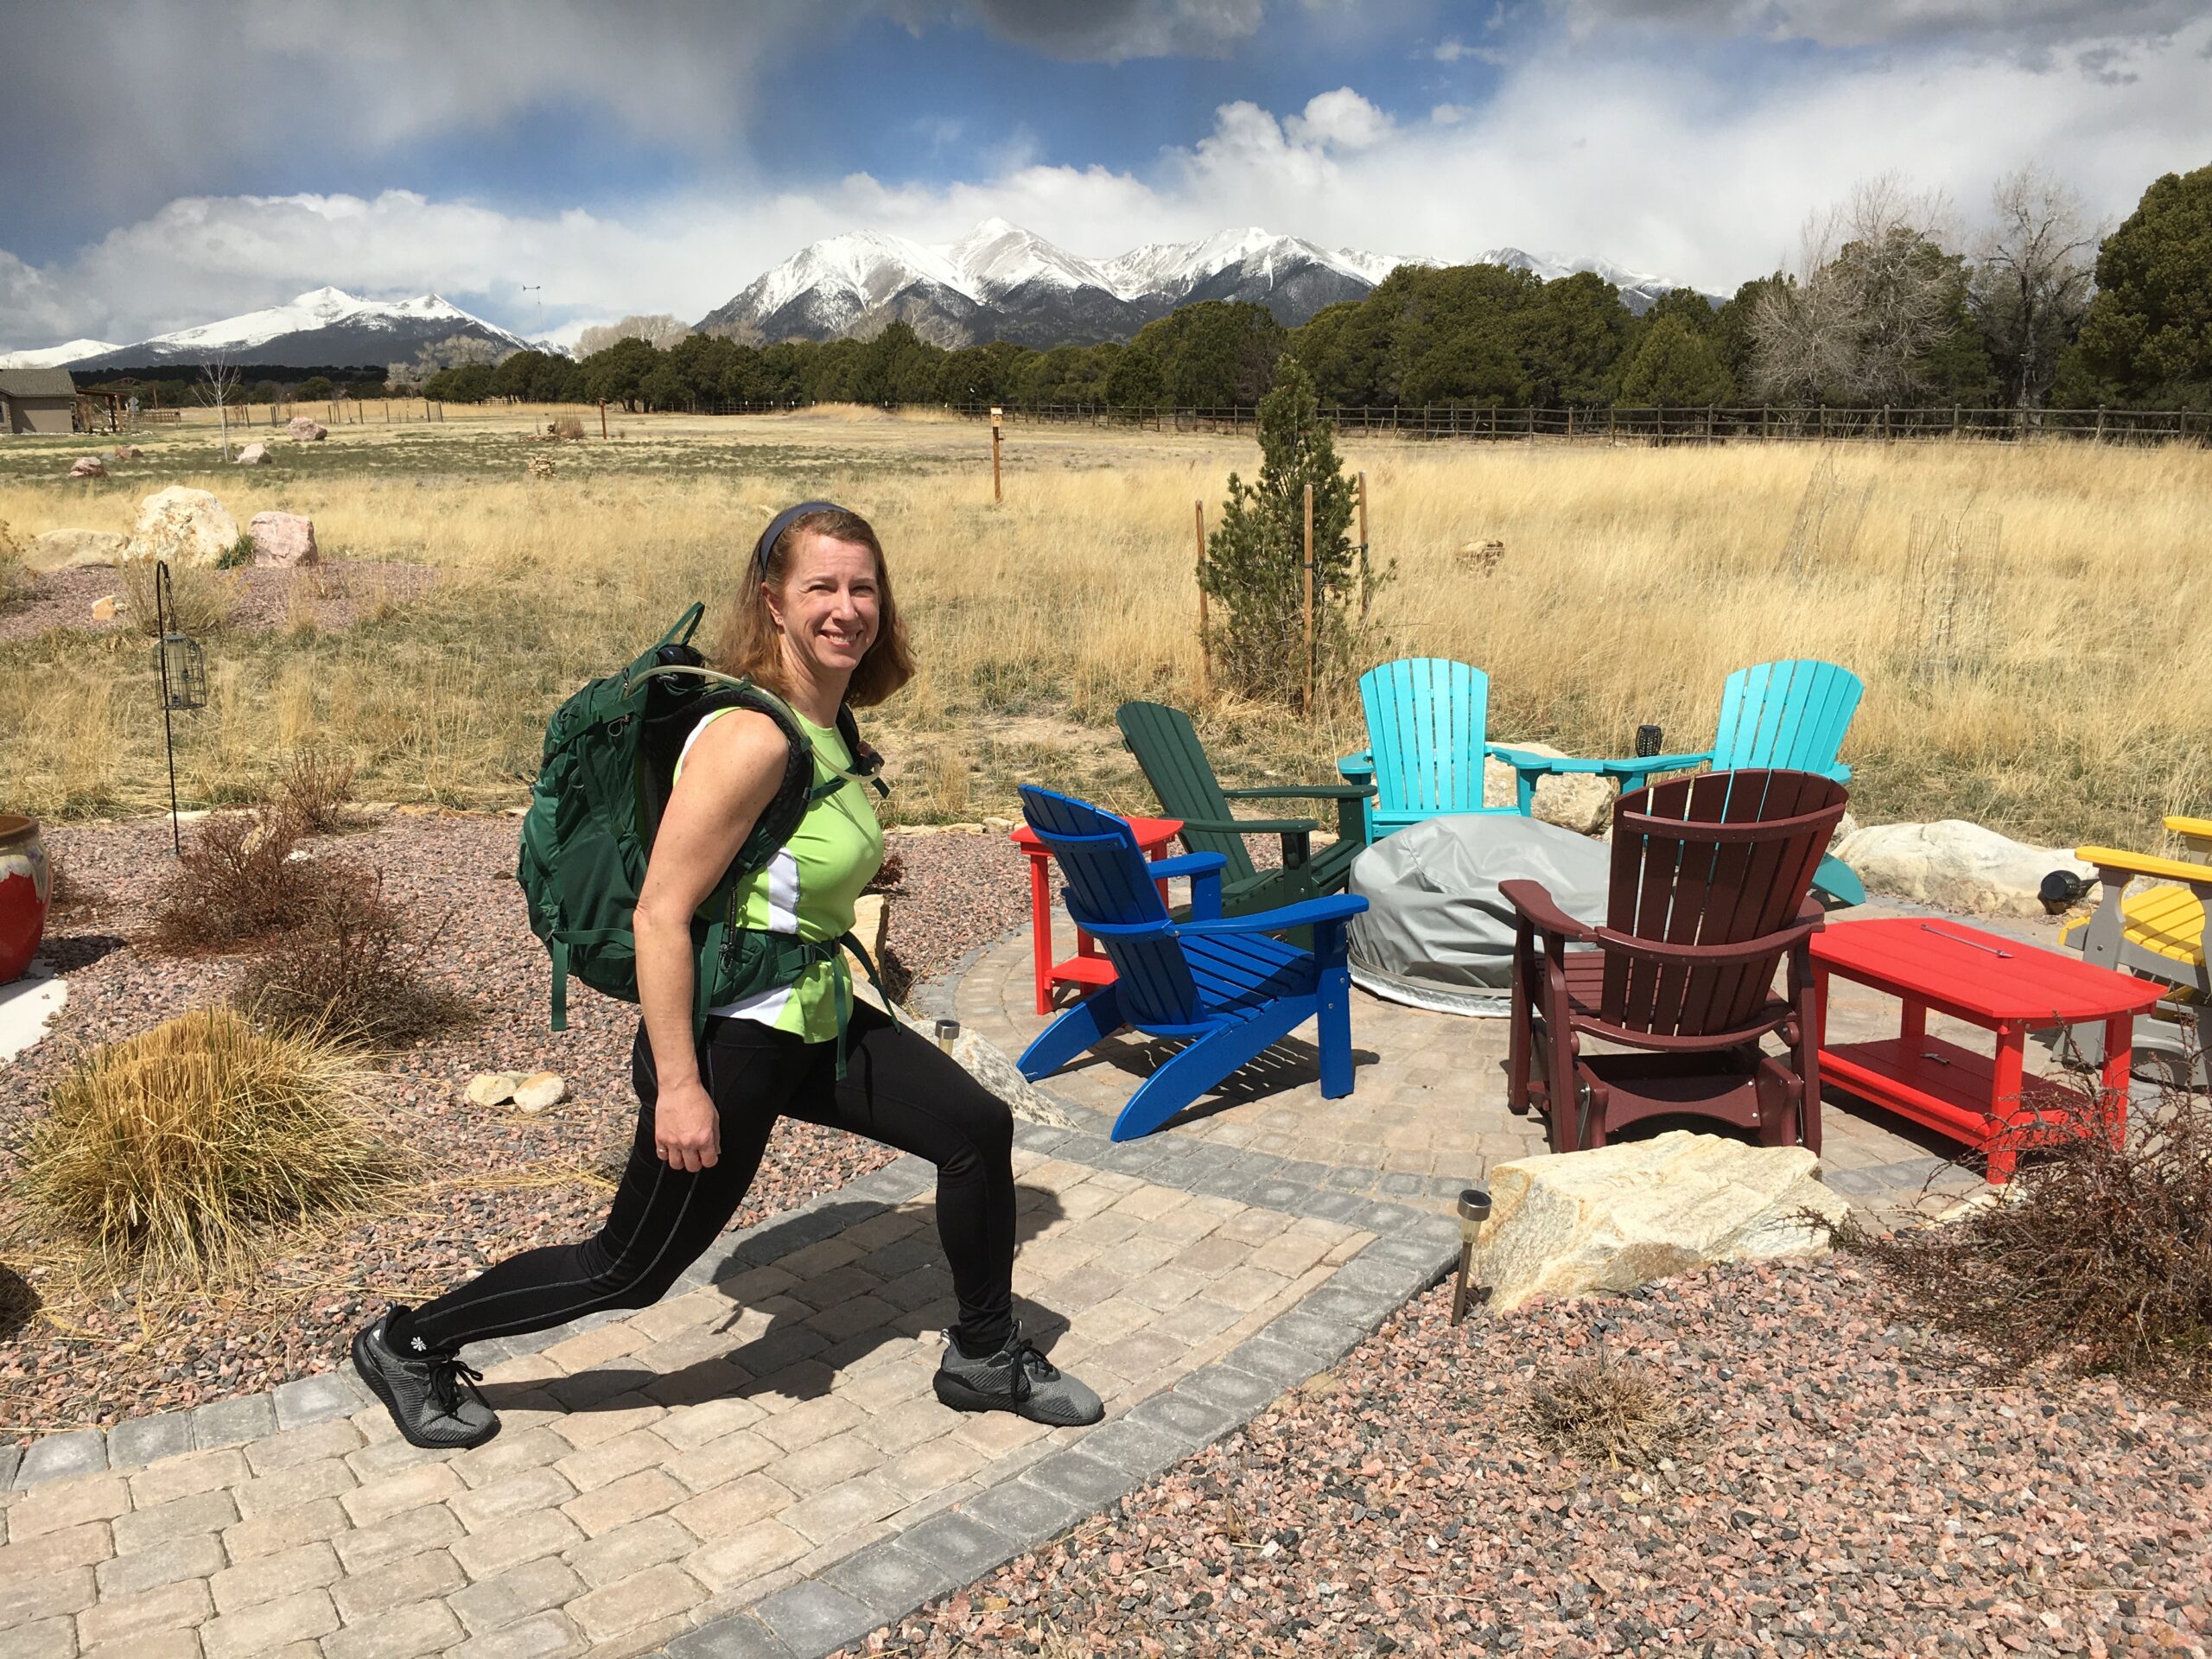
  • backpack with gear, water jugs etc. – bonus points for being able to add or remove weight as needed, and getting used to putting it on, taking it off, lifting it, etc.
  • water jugs – fill with water, sand, kitty litter, etc., add or subtract the amount as needed
  • books
  • pets … if they will tolerate it! My cat weighs 20 pounds, though she might scratch my eyes out if I try to use her for chest press, lol!

Of course you can also use dumb bells, barbells with plate weights, kettle bells, machines, resistance bands, strap systems like TRX, weighted balls, etc.

There are lots of sources for strength training workouts. As long as they align with the suggestions above, you should get value from them. Some virtual training programs that I’ve tried include Apple Fitness, BODi (formerly Beachbody), and Les Mills. 

Many gyms offer strength training classes, and some HIIT classes include strength components. CrossFit supports strength building too.

So no excuses – strength training is beneficial for everybody, affordable, and can be done just about anywhere. All it takes is some time and structure, and the payoffs in how your body feels on your hiking trip are well worth the investment!

If you’re interested in a customized plan that includes strength training workouts and coaching, check out my Adventure Coaching packages. Want to talk it through? Set up a free 30-minute consultation call.


How to Train for a Multi-day Hiking Trip

How to Train for a Multi-day Hiking Trip

As the pandemic “travel hold” eases up, I’ve had several clients who are training for a multi-day hiking or walking Bucket List trips. So I gathered my advice for how to train for a multi-day hiking trip to share with you!

 Check out my WEBINAR on this topic: replay available here!

Does your Bucket List include at least one multi-day hike or trek? Maybe the Camino de Santiago, which I did in May 2022. Hiking in the Alps has been on my list since watching the Sound of Music as a kid – which I did September 2022!

Or are you aiming to do one of the treks to Machu Picchu – my husband and I completed the “Classic” 4-day version in 2013 . Perhaps you’re intrigued by one of the newer options, like the Camino de Costa Rica?

Training for a multi-day hiking trip should involve more than just walking and hiking to prepare. If you want to make the most of this type of trip, here’s how to get started and gain momentum toward your goal!


Getting (Re)Started Hiking

Whether it’s been months or years since you’ve hiked regularly, or even if you’ve never really hiked, you can do a multi-day trek if you have the time and the motivation.

If the multi-day hiking trip you want to do is more than 3 days and more than 20 miles total, and you’re not hiking or walking regularly now, you should start training at least 3 months before the trip.

The key is to start small and slow, then increase your activity gradually. If you’ve been less mobile because of an illness or injury, check out my webinar on “Returning to Exercise After and Injury” or see this post on 5 focus areas for a post-injury hiking trip.

Look for short hikes in your area, and start with what feels doable for you. Then add about 10-20% to your total distance or time each week as you get more comfortable. You can use a pedometer app on your phone or a fitness tracker/watch to gauge the distance.

Sites like AllTrails and apps like Hiking Project are helpful for finding hikes. They show detailed information about the distance and elevation change of the trails, plus reviews from hikers.

Another great resource is your local parks and recreation department. Or stop by a store that sells outdoor clothing and gear and ask one of the employees.


Using Stairs to Train for Hiking

As you do more hiking, your large leg muscles – quadriceps, hamstrings and calves – will get stronger. That said, when you’re training for a multi-day hiking trip, doing specific strength-building exercises with your legs will help you be more stable and less tired on longer hikes.

One simple and effective exercise is step-ups, which are exactly what they sound like: stepping up on stairs or a bench. You can start with a single step, then use a longer staircase to go up and down – actually, the down is as important as the up.

Also step up sideways – that strengthens the muscles that will help you be more stable on uneven terrain when you’re hiking.

If you don’t take stairs much currently, here’s a good starting point:

  • 40 steps up and down on each leg
  • 20 side steps up on each leg
  • At least two times per week
  • Add 5-10 steps up and down, and 2-5 side steps on each leg, each week

After a couple of weeks, get your backpack, put some weight in it, and climb stairs wearing it.

If your multi-day hike includes steep sections, work up to taking the steps two at a time up and down.


Strength Training for Hiking

Incorporating strength training as you’re preparing for a multi-day hiking trip will pay off with increased endurance and reduced risk of injury. 

If you haven’t done much strength training in the past, learn more about it on my webinar “Building Strength for Your Upcoming Adventure.”

Exercises for Core Strength

As you hike, especially with a backpack, you’ll be twisting and leaning as you navigate uneven terrain. The muscles in your abs and back are key to keeping you stable and upright.

Holding a plank position is a popular way to build core strength. You can start by doing a plank against a wall, then on the floor with your knees on the ground, and work your way up to being on forearms and toes.

Hold the plank with good form for as long as you can, then add a few more seconds each time to get to 1 minute. Remember to keep your abdominal muscles tight and tailbone tucked, don’t let your lower back arch.

Strengthening your oblique muscles will help as you bend and twist when you’re hiking on uneven ground. They’re also used as you’re putting on and taking off a backpack.

One way to improve your obliques is side twists. Sit in a chair and hold a weight in front of you with your upper arms at your sides and elbows bent at 90 degrees. Turn your torso at your waist as if you were going to pass the weight to someone next to you, then turn back to the middle, and then turn to the other side.

Core workout:

  • Plank for 30-60 seconds, at least once a day
  • Side twists – start with 10 per side once a day, add 2-5 more per side per week (check out this video of doing them using a backpack)

Exercises for Upper Body Strength

Although you may be tempted to focus just on your legs and core, don’t neglect your upper body. Strengthening your chest, back and shoulders will help you be more comfortable holding the additional weight of your pack. Plus you’ll use your biceps and triceps to lift the pack.

If you use trekking poles, which I highly recommend, a stronger upper body will help you use them to take pressure off your hips and knees.

The classic exercise for building upper body strength is good old-fashioned pushups. As with plank, you can start with doing pushups against the wall. Then move to the floor with your knees on the ground and do as many as you can. As you get stronger, lift one knee and then both knees so you’re on your hands and toes as you lower your chest to the ground and then push up.

You can also use your backpack to strengthen your arms and back. Put in a few soup cans or bottles of water to start. Bend your knees, keep your chest up and grab the top of the shoulder straps. As you stand, lift the pack up in front of you to about chest height, then lower it back down to the ground.

You should have enough weight in the pack that your arms get tired after 10-15 lifts. If you are comfortable lifting it 15 times, add 2-3 more cans or bottles the next time. Keep adding more weight until you get to the point where your arms are tired after 10 lifts.

Upper body workout:

  • Pushups – 10-15 at least 2x per week
  • Pack lifts – 10-15 at least 2x per week (check out this video of pack lifts)


Improving Your Balance for Hiking

Better balance reduces your risk of injury while hiking. By practicing balance regularly, you’ll be better equipped to deal with uneven ground and unexpected movements, like a rock shifting under your boot.

Balance exercises help you build the smaller muscles and tendons that surround and stabilize your larger muscles and joints.

A simple way to improve balance is to stand on one foot on various surfaces – carpet, concrete, grass, dirt, gravel, rocks. Also do this on a hill – facing uphill and downhill. Aim for 30 seconds per leg to start and work up to 60 seconds. Notice which foot or side feels more stable. Then put on your pack and do it.

Add time to your balance routine gradually. Spend extra time practicing balance on your weaker side.

Focus on Flexibility for Hiking

Finally, don’t forget about flexibility. When you’re more flexible, it’s easier to reach that awkward step or hand hold as you navigate more challenging terrain. And you’re less likely to strain your muscles along the way.

At a minimum, stretch for 5 minutes after a hike or strength workout. Hold each position for about 30 seconds.

Yoga and Pilates help with both flexibility and balance, plus many of the common moves in these practices strengthen and tone muscles. Adding at least one session per week will help you work out the kinks from your increased activities. Find a studio with qualified instructors, especially if you’re new to these practices.

Sample Hiking Training Program (PDF) 

One of the basic principles for training is to add more effort gradually – about 10-20% additional per week. For hiking, additional effort can mean more miles and/or steeper hills, and/or a heavier pack. For strength training, additional effort can be a combination of more repetitions or time, and additional weight.

Click here to download a PDF of the first 6 weeks of a plan for a person who is generally healthy, though not exercising regularly, who wants to complete a 3-day, 20-mile inn-to-inn hike carrying a day pack with moderate elevation changes (no more than 1,000 feet per day).

If you’re interested in a customized plan and coaching, check out my Adventure Coaching packages, or set up a free 30-minute consultation call.

Multi-tasking and Mindset Tips!

If training for a multi-day hike sounds like a lot to add into your already busy life, find creative strategies for multi-tasking!

  • Practice balance by standing on one foot while you’re brushing your teeth.
  • Hold a plank while you’re watching your favorite show or reading a book.
  • Take the stairs instead of the elevator at the office or while doing errands.
  • Take your dog for an extra-long walk or two. If you don’t have a dog, walk a neighbor’s pup.

If you’re struggling with confidence, try these mindset strategies.

And remember to take it one step at a time – literally and figuratively!

Training for a Multi-day Bicycling Tour

Training for a Multi-day Bicycling Tour

Watch the WEBINAR: How to Get Geared Up for a Multi-day Cycling Tour  Register here!

In the dark days of January 2021, with COVID travel limitations still in place, though vaccines offering a glimmer of hope, we started planning our next trip. By March we had a rough itinerary and in April we paid deposits. In July we started training for a multi-day cycling tour!

Kicking off our first international trip in two years was a week of cycling Croatia’s southern Dalmatian Islands, riding their roads and cruising the Adriatic Sea on a boat in between them. Finally we’d be in a different part of the world, experiencing another culture!

Several friends of mine have gone on bicycling trips like this before. I’d admired their photos and enjoyed their stories of exploring places via two wheels. We signed up with Islandhopper , a company our friends had toured with before.

Although I usually ride my bike a couple of days a week, and used to ride more often, I’d never done a week long bicycle tour. I started to wonder, how would I feel after day 3 or 4, and by day 6 of cycling?

Several hours a day, multiple days in a row is a lot of “time in the saddle” of a bike. As I reviewed the trip itinerary, though, I noted that the daily distance was 12-30 miles. The elevation change didn’t look too crazy hard. We could totally do this!

Preparing for a Multi-Day Bike Ride

With the mileage and terrain in mind, I created a training program for a multi-day cycling tour for the four of us going on the trip. Of the group, two of us usually ride bikes at least two days a week, one rides once or twice a week, and one rides periodically.

Here’s our training plan for a week-long bike tour:

  • Week 1: 2 bike rides for 30+ minutes, 2-3 strength training workouts*
  • Week 2: 2 bike rides for 45+ minutes, 2-3 strength training workouts
  • Week 3: 2 bike rides for 60 minutes, 2-3 strength training workouts
  • Week 4: 3 rides for 45 minutes, 2-3 strength training workouts
  • Week 5: 2 rides for 45 minutes, 1 ride for 1 hour, 2-3 strength training workouts
  • Week 6: 2 rides for 45 minutes, 1 ride for 1.5 hours, 2-3 strength training workouts
  • Week 7: 2 rides for 1 hour, 1 ride for 2 hours, 2-3 strength training workouts
  • Week 8: 2 rides for 1 hour, 1 ride for 2.5 hours (~20-25 miles), 2-3 strength training workouts
  • Week 9: 3 rides for 1 hour, 1 ride for 2.5 hours (~20-25 miles) with hills, 2-3 strength training workouts
  • Week 10: 3 rides for 1 hour, 1 ride for 3 hours (~25-30 miles), 2 strength training workouts
  • Week 11: 3 rides for 1+ hours, 1 ride for 3 hours with hills, 2 strength training workouts
  • Week 12: 1-2 easy rides (tapering off level of activity for muscle recovery)

Creating the Bike Tour Training Program

I set up the training goals to be based on time rather than mileage for a couple of reasons. One was to get our butts ready for the amount of time we’d be sitting on a bike seat, and our legs used to pedaling, for up to 4 hours on the longest day.

The average miles per hour when bicycling can vary depending on the type of bike and the terrain. I can cruise through 30 miles in 2 hours on my road bike on fairly flat land. Yet it could take me 4+ hours on my mountain bike with hills. We’d be on hybrid bikes, so I figured the time would be somewhere in between.

I also chose time-based targets to make it easier to plan. That way we could set aside specific chunks of time during the week for preparation.

Coincidentally, my friend Kit Parks, who hosts the Active Travel Adventures podcast, signed up for a similar cycling tour in Croatia starting the day after us! Her trip was through a different tour company, and her expected mileage was more than ours.

So I developed a bicycle tour training plan for her based on her itinerary. It also took into account that she’d be on trekking trips in Italy and Slovenia for a few weeks before going to Croatia. She probably wouldn’t have access to a bike during that time, so her plan included more bicycling before she left the U.S.

Lessons from our Multi-Day Bike Tour

Spoiler alert: We did it! In the spirit of full disclosure, two of the four of us rode eBikes, which made the experience far more enjoyable for them than if they’d ridden the standard bike.

I rode the standard “trekking bike,” as the guides called it. It turned out, I was one of 3 people in the road tour group who rode a standard bike, rather than an eBike, for the whole trip (2 others switched to eBikes for the longest day of riding).

This sturdy bike was similar to my first hybrid bike, with an upright sitting position. It had wider tires than my road bike (thinner than mountain bike tires) and a steel frame. I really noticed the weight on the one stretch where I pushed the bike for about 100 yards on a particularly steep hill. I definitely missed my carbon fiber road bike!

I’m glad I put in the time to train on my bike before the trip. I felt more comfortable and confident that I’d be okay at the end of the day, which I was. At the end of the longest day, after about 32 miles and 3,000 feet of elevation change, I was definitely ready to get off the bike! Yet I was ready to ride again the next day.


Honestly, if you ride an eBike for a trip like this, you don’t really need to train to this extent. Many of the people riding eBikes said they rarely ride, and they did just fine. The eBikes do require pedaling though! And if you have to push an eBike (if the battery runs out), it’s REALLY heavy!

One thing I wasn’t expecting was changes to the itinerary we’d gotten before the trip. We ended up going to the islands in a different order than was outlined in our materials. And one destination was changed entirely because of construction and weather conditions.

The guides also adjusted some of the routes based on our feedback. So the distances for each day were different than I thought they would be, though still in the range of the original plan.

Exploring the islands by bike was a great way to notice differences in the flora among the islands, take in the views and burn off the generous meals they fed us on the boat! We stopped in little towns for coffee, hopped off our bikes to pick and eat local berries, and cruised along well-paved roads.

You can find a slideshow of photos here.

I’m already looking forward to future bicycling tours!

When to Start Training for an Adventure Trip

When to Start Training for an Adventure Trip

You’ve started thinking about an upcoming hiking or biking trip. Then you start to wonder, how long does it take to get in shape for this type of trip?

One of questions I’m asked most often is how far in advance of a trip or activity to start training. Usually the question comes up for a “bucket list” trip, like hiking the Inca Trail to Machu Picchu or a multi-day bike trip through wine country. It’s worth considering for any trip where you’ll be doing more physical activity than normal, though.

By training to get ready for a trip where you’ll be spending more time and effort on physical activity than in your day-to-day life, you’ll have the strength and stamina to make the most of the experience.

You’ll feel more comfortable throughout the day and have more energy at the end of the day. You’ll be able to focus on what you’re seeing, who you’re with, and what you’re learning, rather than worrying about keeping up with your partner or group, or if your legs are going to give out before you reach your destination.

Having a big trip coming up can be a great source of motivation to get more physically active. To figure out when to start training for an adventure trip, take into account these factors:

  1. What activities you’re doing on your trip
  2. Your current activity level
  3. How much time you can realistically commit to training

Your Trip’s Activities

Back in 2013 my husband and I hiked the Inca Trail to Machu Picchu. Although we live in Colorado and usually get out for at least one hike on summer weekends, we rarely hike more than 2 days in a row, and most of our hikes are 4-8 miles.

The Inca Trail route we chose involved 4 days of hiking 7-10 miles per day with up to 3,000 feet of elevation gain and loss on a couple of the days. Could we have just kept with our normal hiking routine and gotten through it? Probably – but we may not have been able to enjoy it as much as we did.

Fortunately, I’ve learned from experience how to get in shape for hiking longer distances. I injured my left knee in my mid-20s doing a 26-mile hike, and now if I hike a lot more miles than I normally do, my knee tells me about it. I know that I need to add mileage gradually and build up to longer distances. And I need to hike several days in a row to build up my muscles for a multi-day trip.

We started training in late spring, about 3 months before our trip in mid-August. We picked hikes with more elevation change than we normally would to train for the steep hikes in the Andes. As we got closer, we hiked both weekend days and took longer walks in our neighborhood during the week.

When we met up with our group for the Inca Trail trip, we looked around and realized we were the oldest ones. Yet on the first day, we were the first ones to camp, and among the first to make it to the highest point on the second day.

Our training paid off – no knee issues for me, and we had plenty of time and energy to explore the amazing Inca ruins along the way.

So step 1 is to evaluate your trip’s activities. Are you doing one “big day” where you’ll be spending hours on a hike, bike ride, paddling or other physical activities? Do you have multiple days in a row of more activity than you’re used to? Will you have rest days in between active days?

By looking at the length, duration and number of days you’ll be active, as well as any special circumstances (high altitude, lots of elevation gain/loss), you have the “end goal” in mind as you consider how much time you’ll need.

Your Current Activity Level

In my Inca Trail scenario, my husband and I started with an existing base of fitness for hiking. So we were able to start from there and add to it to train for the steep hike.

In fall 2021 we did a trip where we’d be biking for 5 days in a row in Croatia. I try to get out on my bike periodically during the winter and spring, but honestly, it can be tough to do that where we live. And my husband only bikes periodically, even in the summer.

So guess what we did that summer – got on our bikes and started riding at least 2-3 days a week as our trip gets closer!

Be honest with yourself about your current activity level, and how it compares to what you’re planning to do on your trip. If you’re going to be walking 5+ miles a day, and right now the only walking you’re doing is to your car and back for work and shopping, you’ll need a bit of time to build up to 5 miles.

Time Available to Train

Commitments for work, family, community and more fill our days and weeks. Finding some time for training may be a challenge.

If your schedule is already pretty tight, you may need to allow for a longer timeframe for training. For example, if you can only set aside half an hour twice a week, and limited time on the weekends, then you may want to begin six months before your trip.

Another reason to start sooner is if you anticipate you’ll be busier than usual before your trip.

When I was in my corporate job, I was heavily involved in an annual meeting that required extra work. The event also aligned with an especially busy time in our marketing cycle. During the weeks leading up to the conference, I didn’t have time for anything extra!

If you can keep doing at least some activity during those busy times, that’ll help you maintain momentum.

Calculating Your Timeframe

Now that you know a bit more about the three key factors, let’s look at some examples.

Example 1: Multi-day hike or bike, periodically active, 2-3 hours a week to train

In this scenario, I’d aim for at least 3 months to prepare since it’s a multi-day stretch of activity. With a few hours a week, you’ll be able to add activity amount gradually to build up to longer distances.

Ideally, as you get closer to the trip, you’d be able to carve out a bit more time and do back-to-back days of hiking or biking to simulate your trip experience.

Example 2: One “big activity,” not currently active, 1-2 hours a week to train

For this situation, it may be better to take 4-6 months to get ready. That gives you more time to add small increments to your activity level – I usually recommend adding 10-20% in distance per week.

Let’s say you currently walk a few blocks at the most (about half a mile) a few times a week. For your trip, you want to be able to walk up to 10 miles. I’d suggest starting off adding a block or two to each walk. Soon you’ll be up to a mile per walk, and in a month or so you’ll be up to about 2 miles per walk.

As your stamina builds, you’ll add more distance. By increasing distance gradually, you’re less likely to get an injury. And if you have to take a week off, you have time to make up for it.


Get Personalized Help

As a personal trainer and adventure coach, I help people with this calculation all the time. Want an estimate based on your specific situation? Just email me at becki@trailblazerwellness.com and I’d be happy to help you figure out when you should start training for an upcoming adventure!