Training for High Altitude: Myths and Facts About What You Can Control

Training for High Altitude: Myths and Facts About What You Can Control

You’ve been contemplating hiking the Inca Trail to Machu Picchu, climbing Kilimanjaro, or trekking to Everest Base Camp. Chances are you’ve been wondering about training for high altitude. And you’ve probably found a LOT of information about what to do – some of it conflicting or confusing.

People ask me about how to train for high altitude (above 10,000 feet is usually where the concern kicks in) all the time. Many of my clients are planning trips to high places, and of those, most live at or near sea level.

The good news is that living at low altitude does not doom you to misery when you reach high altitude! Even if you’ve had tough times at higher altitudes in the past, you could have a different experience the next time.

The less reassuring news is that there’s no “magic formula” training plan that will guarantee you’ll be fine at high altitude. At least not that humans have figured out yet.

There are some guiding principles and factors, though, that put the odds in your favor. I’ve explained this using a “backpack analogy” below.

But first, let’s go through a few myths and facts about humans and high altitude.

1: A certain training regimen or fitness level will guarantee you won’t have a hard time at altitude. If you’re fit, you won’t have a hard time at altitude.


Myth! The fact is, anyone can feel the effects of high altitude. Even people who are super fit, including runners and mountain guides, can and do get symptoms such as headaches, nausea, digestive issues, sleep issues and shortness of breath as they reach higher altitudes. I have seen fit people struggle at high altitude firsthand.

Not everyone gets these symptoms, and an individual might feel them on one trip and not another.

Being fit can help the rest of your body feel better during physical exertion at high altitude.

2: If you haven’t had trouble at altitude in the past, you’ll be fine at higher altitude.


Myth! One of my best friends who has climbed more than 100 peaks higher than 13,000 feet suddenly started getting sick when she was sleeping at 10,000 feet or higher. The fact is, various factors can contribute to your likelihood of experiencing altitude sickness.


3: If you have had trouble at high altitude in the past, you’ll always struggle with it.


Not necessarily true. There are some factors that you may not be able to control that can contribute to a higher likelihood of getting sick at higher altitudes.  Yet there are others that you can control, so it depends.


4: If you live at sea level, you should use an altitude training mask (also known as an elevation training mask or hypoxia mask) or hypoxic tent or work out in a gym with a high altitude simulation room.


Myth! You don’t have to invest in these tools to prepare for a high altitude adventure. You can, though the impact they have is variable and debatable.


A Backpack Analogy for High Altitude Hiking


Scientists, doctors and others have been studying what happens to the human body as we go to higher altitudes, and why we experience certain symptoms, for a while now. Like most ailments that afflict us humans, it’s complicated.

I’m not a doctor, but I’ve read, seen and experienced a fair amount related to high altitude. I’ve lived and been active in Colorado for 20+ years, though I grew up in Michigan (flatlander!) and lived near sea level for the first 30 years of my life.

I’ve also worked with many clients who have done hiking trips at high altitude, many of whom live at sea level. Many of them have been fine, some of them have struggled.

Here’s a way to think about the factors that contribute to what your experience may be at high altitude.

Let’s say you have a backpack that carries the things that impact how you feel at high altitude. If your backpack is loaded down with too many things, you’ll feel like crap.

And if it’s really loaded down, you might experience life-threatening illnesses such as High Altitude Pulmonary Edema (HAPE) and/or High Altitude Cerebral Edema (HACE).

Some of the items you can control whether or not to include, others are automatically included. Ideally, you keep this backpack as light as possible!

Here are some factors you can’t control:

  • Genetics
  • Age
  • Where you live (unless you’re able to relocate for a while before your trip)
  • Health history, especially related to cardiovascular and pulmonary system conditions – asthma, etc.

Some factors you may be able to control include:

  • Current medical conditions, with a doctor’s guidance and possibly medication
  • Where you train, if you can get to higher altitude frequently
  • Early arrival/time at altitude before activity starts (for example, spending 2-3 days relaxing at 10,000 feet before hiking)
  • Itinerary – gradual increase in altitude, especially during the first few days of activity

Factors you can control:

  • Pre-trip training and fitness level
  • How much and what you drink
  • How much and what you eat
  • Rest
  • Stress level
  • Pace

Lighten Up Your Backpack: How to Prepare for High Altitude Pre-trip


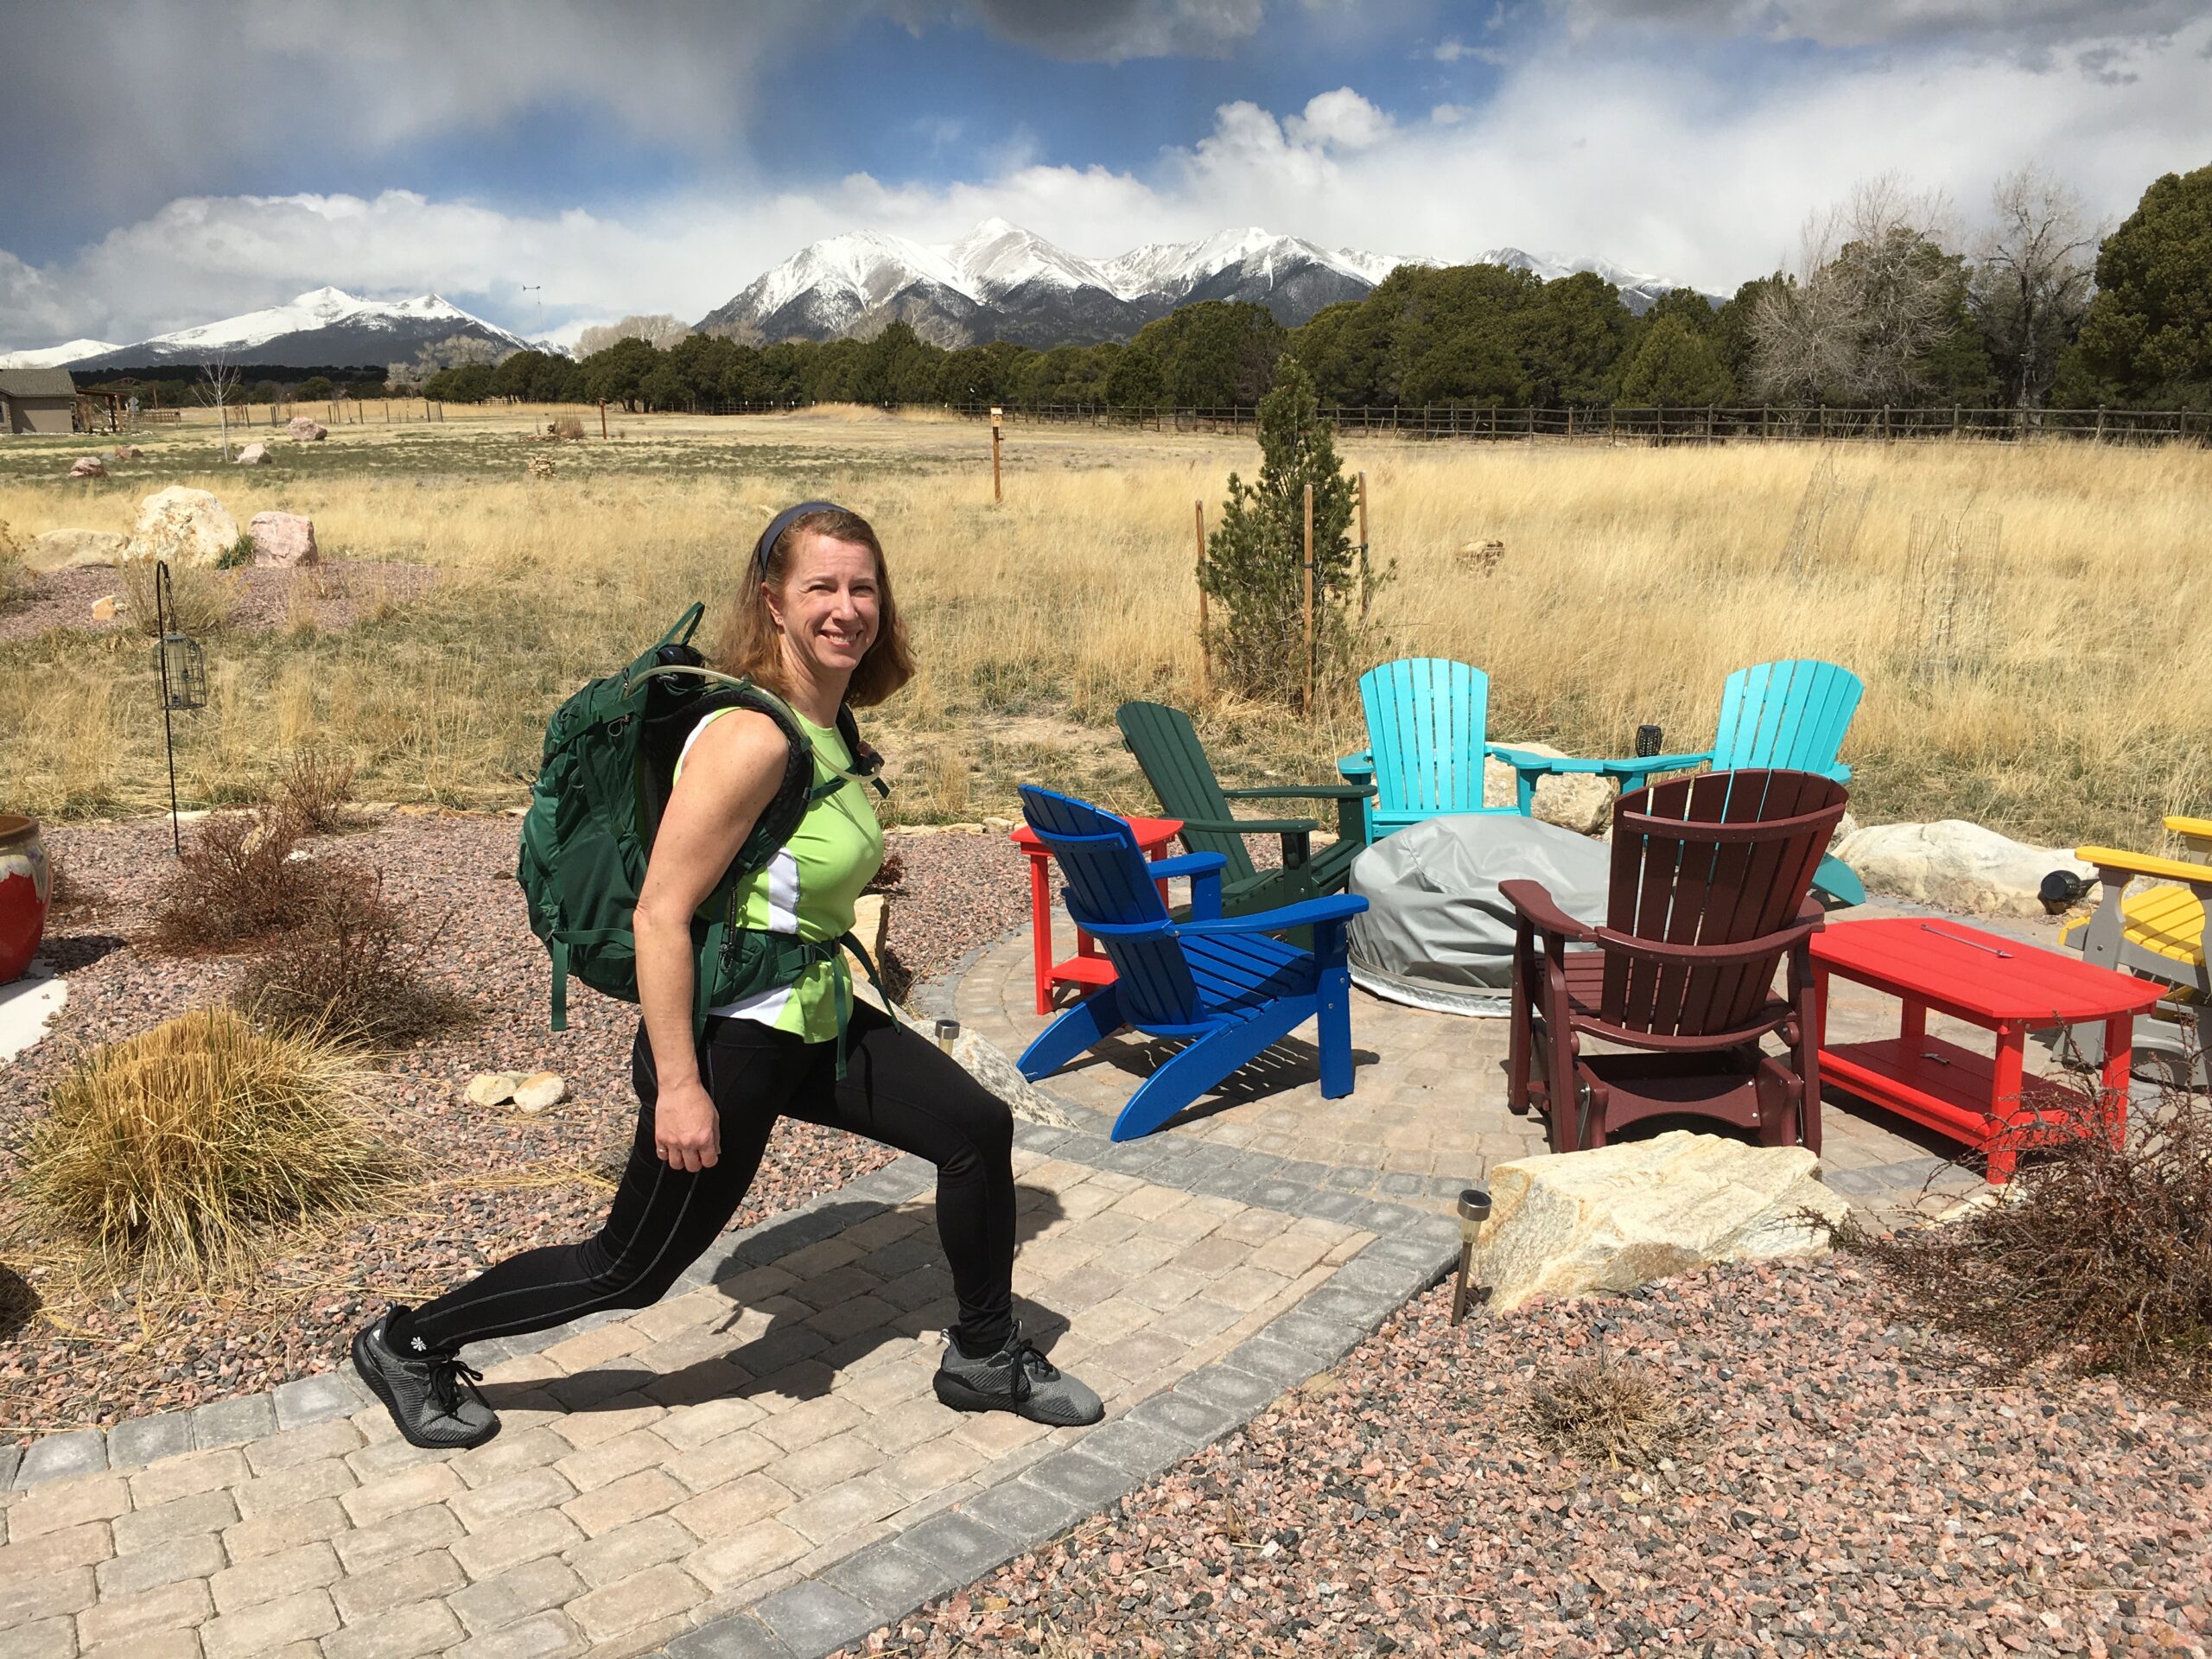
Before your mountain adventure at high altitude, it can help to be as fit as possible. After all, who wants to have burning quads and cramping calves while they also struggle to breathe?

This does NOT mean doing high intensity interval training sessions every day. In fact, you don’t have to do HIIT at all. If you do, once or twice a week is plenty.

It does mean doing a fair amount of aerobic activity, aka cardio training. Walking, hiking, cycling, etc. all helps build your muscles (including your heart!) to adapt to be able to handle more activity.

Strength training also makes a difference in how your muscles will feel after multiple days of activity. The stronger they are, the more efficient they will be. That’s a plus.

If you want to know more specifics, check out my post “What to do to Train for a Multi-day Hiking Trip.”

Some people have also found that doing pre-trip breathwork training has helped them breathe better and feel more comfortable when they go to high altitude.

If you’re interested in this, check out my favorite breathwork expert Anthony Lorubbio’s program: https://www.recaltravel.com/train-for-altitude-with-breathwork/

Lighten Up Your Backpack: What to Do at High Altitude


The day has arrived for you to start your high altitude adventure – yay!

What you do during the trip can set you up for a better chance of success too.

If you’re with a good guide company, they should be encouraging these behaviors. If you’re doing a self-guided trip, plan to check in with yourself and your companions on these points.

  • Drink plenty of water. Your pee should be pale yellow, barely more color than water. As an example, I drank about 4 liters of water a day during my Kilimanjaro climb.
  • Eat regularly, mostly carbs, when hiking. Carbs are the fuel your body can most quickly convert to energy, which is especially critical as you ascend to higher altitudes. Loss of appetite can kick in during exercise, especially at high altitude. You still MUST EAT!
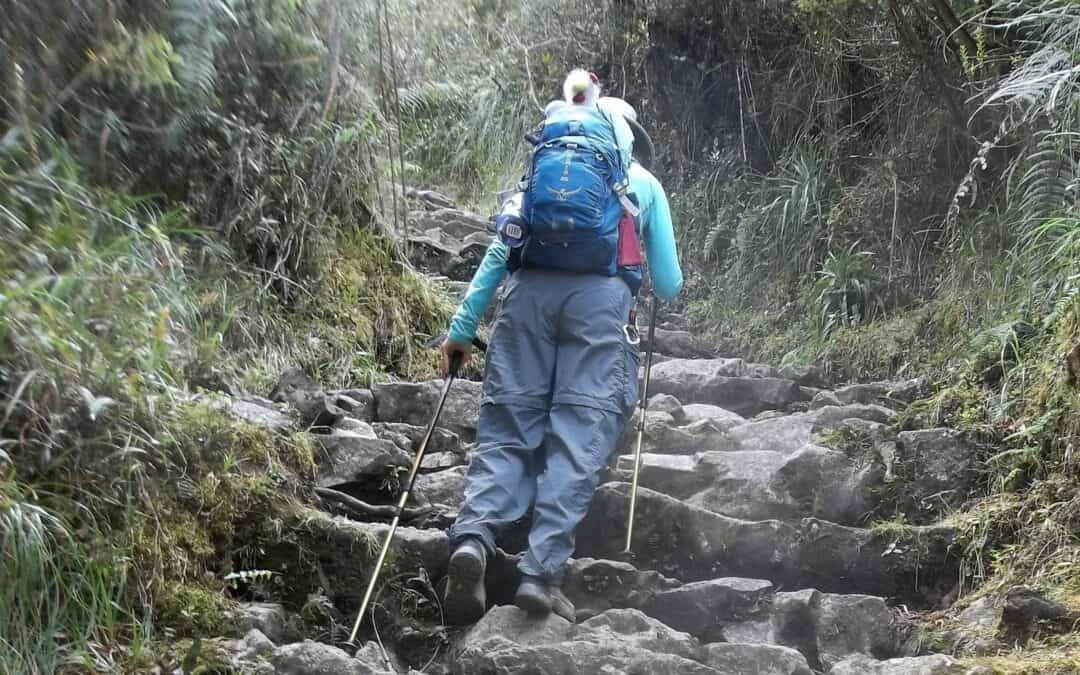
  • Walk/hike slowly as much as possible. This might be tricky depending on how many people you’re with, how many guides you have, and your itinerary. If you go too fast for your body, though, you’re adding to your “altitude backpack” load.
  • Sleep and relax at least as much as usual, if not more, when you’re not hiking. Your body needs time to recover and manage the additional stress of high altitude conditions.
  • Minimize stress. You may need to tap into various tools in your stress management toolbox, such as breathwork techniques, mindfulness, journaling, listening to music, reading, whatever helps you relieve stress (except additional exercise).

Obviously there’s a lot more to the high altitude hiking equation. But I hope this gives you some ideas, and possibly comfort, about what you can do to improve your odds of enjoying your trip!

Want to talk about your upcoming high altitude trip and your specific situation? Set up a free 30-minute consultation!


How to Build Strength for Your Hiking Adventures

How to Build Strength for Your Hiking Adventures

An often-overlooked element of training for a hiking adventure is strength training.

Most of the advice that’s online about training for a hiking trip – including the Inca Trail or Salkantay Route to Machu Picchu or climbing Kilimanjaro – focuses on hiking to prepare. And of course, doing more of the activity you’ll be doing on your trip is important!

To have more energy and stamina for long days of hiking in a row, strength training, also called resistance training, is a key ingredient in your overall training plan.

 Check out my WEBINAR on this topic: replay available here!


Why should you do strength training to prepare for hiking adventures

Including strength training as you prepare for a multi-day hiking trip helps you in several ways:

  • Building stronger muscles helps your body be more durable and resilient, especially for multiple days of hiking.
  • Stronger muscles give you more power and improve your efficiency as you move throughout the day.
  • Being stronger reduces your risk of certain types of injuries too, such as strains and potentially sprains.

Strength training has been shown to reduce or stop muscle mass loss that can occur as we age.

For women in perimenopause and menopause (myself included!), changes in hormones impact our strength and muscle mass. Strength training can help offset those impacts.

Strength training, along with other weight-bearing exercise, also improves our bone density. This is especially important if have osteoporosis or osteopenia, or are at risk for it.

So if you want to keep doing hiking trips over the coming years – like I do –  strength training will help!


Key components of strength training for hiking

Strength training routines for hiking should incorporate all major muscle groups.  This includes legs (quadriceps, hamstrings, calves, glutes), core (abs and lower back), and upper body (back, chest, shoulders).

Do strength training for all muscle groups at least twice a week to achieve gains that make a difference. You can configure this many different ways, while allowing 48 hours in between strength sessions for each muscle group.

Here are some options:

  1. Full-body session 2x per week. A single workout that includes legs, core and upper body can be an efficient way to get this done. I usually do Monday and Thursday, and it takes me about 30 minutes per workout. Just pick two days with one or two days in between. Here’s a sample.
  2. Rotating which body parts you exercise throughout the week. Do one muscle group “chunk” per day and rotate to allow for the rest time. For example: Monday = legs; Tuesday = core; Wednesday = upper; Thursday = legs; Friday = core; Saturday = upper; Sunday = no strength training
  3. Paired sets with a day or two in between. Exercise two muscle groups per session that are spread over the week. Options to consider: Monday = upper + core; Wednesday = legs + core; Friday = upper + legs

You don’t have to spend hours at the gym to complete an effective strength training workout. In fact, the full body strength training workouts I’ve created for my clients are less than 30 minutes (not including warmup and post-session stretching).

I’m all about functionality and efficiency when it comes to strength training. To achieve that, I include many exercises that use multiple muscle groups (hello pushups!).

I also structure the workouts so while you’re resting one muscle group, you’re using another muscle group. A sequence of squats – seated twist – bent-over rows allows your legs to rest during the seated twist and rows before you go back to squats.

Now let’s get specific about what to actually do!

Leg strength for hiking

Some people think that the hiking they’re doing to get ready for their trip is enough to strengthen their legs. Yes, your legs will get stronger from doing that.

Doing specific resistance exercises where your legs work under additional load stimulate your muscles to get even stronger though. That’s why world champion runners do strength training! 

Even if you’re not aiming for a personal best speed record, the stronger your legs are, the better they’ll feel at the end of the day. Plus they’ll feel better the next day!

For leg strength, the classics are classics for good reason. Squats, lunges, deadlifts and calf raises get the job done. You can start with body weight, and add your pack with weight in it to challenge your muscles as your get stronger. You should have enough resistance (weight) that your legs feel fatigued when you get to abut 12 reps. Slowing down the movement is another way to add challenge!

I also include leg exercises that work in the lateral plane (side-to-side) in strength workouts. We spend so much time going forward that our muscles supporting lateral movements tend to be underdeveloped. When we go hiking on winding and rocky trails with more angled or side steps, those muscles fatigue quickly!

Here are some lateral leg exercises I like:

  • side steps with a stretchy loop band (above knees) or rope-style band with handles (rope under both feet)
  • side lunges
  • slide leg lift and hold – standing or lying on side
  • side step-ups

Core strength for hiking

Core strength is critical for pretty much all activities you might do on an adventure trip. If you’re hiking, you’ll be using your core for stabilizing your backpack and twisting as you take it off and put it on.

If you have low back issues, you may have been told to work on your core. This is because stronger core muscles provide better support and reduce fatigue for standing and sitting.

A few of my favorite core exercises include:

  • plank hold (on knees is fine, arms fully extended or on forearms)
  • seated twist 
  • side bends
  • bird dog

These simulate the bracing, twisting and bending you’ll inevitably be doing on your adventure trip. Building your strength and muscle memory for this in a controlled environment prepares your body for what’s to come.

Upper body strength for hiking

Be sure to include upper body muscles in your strength training routine. Hikers benefit from strong backs and shoulders for comfortably lifting and carrying their backpacks.

Also, if you use trekking poles (which I strongly recommend for many reasons), upper body strength will help you use them more efficiently.

Including a mix of pushing and pulling exercises sets you up for success.

Pushing exercises – pushups (of course), chest press, shoulder press

Pulling exercises – bent-over rows, upward rows and pull-ups

What to use for strength training 

At this point you might be wondering how much money you’ll need to invest in this strength training stuff. Weights, equipment, and gym memberships can be expensive. The good news is, you don’t have to drop a bunch of money on any of those if you can’t afford it or don’t want to!

You can use LOTS of different things that you probably already have on hand to build strength through resistance. Here are just a few ideas:

  • backpack with gear, water jugs etc. – bonus points for being able to add or remove weight as needed, and getting used to putting it on, taking it off, lifting it, etc.
  • water jugs – fill with water, sand, kitty litter, etc., add or subtract the amount as needed
  • books
  • pets … if they will tolerate it! My cat weighs 20 pounds, though she might scratch my eyes out if I try to use her for chest press, lol!

Of course you can also use dumb bells, barbells with plate weights, kettle bells, machines, resistance bands, strap systems like TRX, weighted balls, etc.

There are lots of sources for strength training workouts. As long as they align with the suggestions above, you should get value from them. Some virtual training programs that I’ve tried include Apple Fitness, BODi (formerly Beachbody), and Les Mills. 

Many gyms offer strength training classes, and some HIIT classes include strength components. CrossFit supports strength building too.

So no excuses – strength training is beneficial for everybody, affordable, and can be done just about anywhere. All it takes is some time and structure, and the payoffs in how your body feels on your hiking trip are well worth the investment!

If you’re interested in a customized plan that includes strength training workouts and coaching, check out my Adventure Coaching packages. Want to talk it through? Set up a free 30-minute consultation call.


Training for Kilimanjaro: 7 Surprising Tips to Prepare for the Climb

Training for Kilimanjaro: 7 Surprising Tips to Prepare for the Climb

Each year thousands of people reach the summit of Mount Kilimanjaro, aka Uhuru Peak, the highest point of Africa. On July 22, 2024, I stepped foot on the Rooftop of Africa! If you’re dreaming of being among them, add these seven surprising tips to your training plan for Kilimanjaro to improve your chances of reaching the summit.

People sometimes ask on social media groups if you need to train to climb Kilimanjaro. Unless you’re hiking multiple days a week with significant elevation changes, I strongly suggest focused training for three months or longer.

Not sure how much time you’ll need for training? Watch my webinar “When to Start Training for Your Bucket List Adventure.”

Typical Advice for How to Train for Kilimanjaro

Before diving into the seven surprise tips, let’s start with the typical advice for a Kilimanjaro training plan. After all, these are all valid and useful activities to improve your physical condition and preparation. 

Do lots of hiking. Of course, hiking is a key component of a training plan for a multi-day hiking trip!

Ideally a Kilimanjaro workout plan includes walking or hiking 4-5 times a week in the months leading up to your trip. Add distance and increase elevation changes for your training sessions gradually, 10-20% per week. Aim to be able to hike close to the distance of your longest day with your full backpack (see below for more about the pack).

Here’s a sample Kilimanjaro training plan for the last 4 weeks of training, which is similar to what I did. This assumes you’ve been building up to this mileage over time:

4 weeks before departure: 3 walks for 4-5 miles with hills, 2 hikes for 6-7 miles with 2,000-2,500 feet of elevation change

3 weeks before departure: 3 walks for 4-5 miles with hills, 2 hikes for 7-8 miles with 2,500-3,000 feet of elevation change

2 weeks before departure: 3 walks for 4-5 miles with hills, 2 hike for 7-8 miles with 3,000-3,500 feet of elevation change

1 week before departure: taper off to conserve energy, 3 walks for 3-4 miles, 1 hike for 4-5 miles with 500-1,000 feet of elevation change

Take the stairs. I definitely include stair climbing sessions in my clients’ Kilimanjaro training programs. Going up and down stairs will build your leg strength for the elevation changes you’ll experience while climbing Kilimanjaro.

Do squats and lunges. I highly recommend these classic leg muscle builders. They will help your legs endure back-to-back days of hiking and be less prone to injury.

Break in your hiking boots. Also wear your boots with the SOCKS you’re planning to take on Kili. It’s the combo of the boots and socks worn together that causes blisters!

Wear your backpack on training hikes. Ideally, you should also fill your pack with the items you’ll be carrying while climbing Mount Kilimanjaro. If you don’t have everything yet, at least put in enough to make it the same weight as it will be for your trip. And be sure to include water – you’ll need to carry 3-4 liters on Kili!

Starting about 8 weeks before the trip, add a few more pounds to your basic daypack. By 4 weeks out, include everything you’ll be carrying each day on Kilimanjaro.

Now for the tips for how to train to climb Kilimanjaro that you may not have heard about yet. 

Tip 1: Go Slow, aka pole pole, on Your Training Hikes

When you review the itinerary for climbing Kilimanjaro, you may notice that some days you’ll only hike 3-5 miles. You may think to yourself, I can hike 3-5 miles in just a couple of hours!

However, hiking 5 miles at high altitude and with tricky terrain may take 5 or more hours. You want to build up your stamina for being on your feet for that amount of time. So don’t rush through all of your training hikes.

You don’t have to hike at 1 mile per hour at home. But I do suggest doing several longer and slower hikes, ideally with a lot of elevation change, that take you at least 4-6 hours.

If possible, do two longer hikes on back-to-back days so your body gets used to that level of activity.

Tip 2: Prepare for the DOWN

Many people worry about how hard it will be to go up. Yet going down can be harder on your body! The eccentric muscle contractions that help you brake or brace yourself on the downhill requires different effort than hiking uphill.

Most Kilimanjaro hiking itineraries are set up with 4-7 days for hiking up, with elevation gains of 1500-4000 feet per day. This helps with high altitude acclimatization and energy conservation.

Then there are only 2 days for hiking the descent back to the base, with a total elevation loss of more than 14,000 feet. That can mean you’re going 7,000+ feet of downhill in one day. That is a LOT of downhill. 

So if you’re tempted to just train on a treadmill and crank up the incline, or spend hours on the stair climber, I strongly recommend you reconsider.

Find some hills or man-made inclines like stairs, bridges or parking ramps, so you can hike up AND down. If you can find a trail with a long downhill section, go hike it a few times.

Tip 3: Do Side Steps on Stairs to Build Hip Strength

In addition to walking up and down stairs, I advise clients to go up and down them with side steps. Simply turn 90 degrees so your feet are parallel to the steps and step up. Here’s a video of side steps in case you’re still wondering how to do it.

We spend so much of our time walking forward on flat ground. This lateral exercise helps build your hip strength for side stepping and uneven ground you’ll be hiking on.

By getting your muscles and joints used to lateral movements as you prepare for your Kilimanjaro hike, you’ll be less sore and have more stamina when you’re hiking for days in a row.

Tip 4: Train on Varied Terrain

The trails to the Roof of Africa go through multiple climate zones and include a wide variety of surfaces. You’ll encounter roots and mud and rocks and snow and ash and more as you climb and descend.

Do your best to prepare your body and feet by finding as much variety in trail conditions as you can. If you’re in Florida, walking on the beach and sand dunes definitely counts!

Use apps like AllTrails or Hiking Project to scope out interesting trails. You can also check with your local outdoor store staff for ideas. You might be surprised what your local parks and recreation areas have to offer!

If you’re not comfortable hiking on unfamiliar trails by yourself, look for a local hiking group via MeetUp or social media.

Tip 5: Get Out to Hike Whatever the Weather

Like the previous tip, this helps condition your body and mind for the variety of conditions you’ll encounter. If you wake up one morning while you’re hiking Kilimanjaro and it’s raining, you’re not going to roll over and hope that it’s nicer out the next day, right?

Of course, be safe, don’t go out in extreme conditions that could be dangerous. But if you’ve planned to do a multi-hour hike on a day when it’s rainy or chilly, that’s a great time to test your gear!

Make sure that rain jacket really is waterproof. Practice putting on and taking off layers. Figure out if what you’re planning to bring works well together to keep you warm and dry.

Tip 6: Practice with Trekking Poles

If you’re not already using trekking poles for hiking, this is a trip where you should strongly consider starting. Go back to Tip 2 about the descent. If you’re still on the fence, read “Why to Use Trekking Poles”.

Don’t wait until you get to Tanzania to try them. Start practicing with trekking poles at least one month before your trip so you get used to the cadence and feel of them. Take them out on your longer hikes that have a lot of elevation change – you may be surprised at the difference it makes.

Here are a few tips on using poles.

Tip 7: Concentrate on Your Core

While strength training for your legs is important for hiking, having a strong core is key for keeping you stable and carrying your backpack comfortably.

You don’t have to have 6-pack abs. You just need to work on building up the strength of your abdominals, obliques and lower back so they can support the twisting, bending and other movements you’ll be doing during the hike.

One simple exercise to do is a lunge-stance twist while wearing your pack. Put on your backpack with a few pounds of weight in it and step forward. Hold the lunge stance and twist towards your front leg. Repeat the twist 10-15 times, then switch legs and twist the other way. Check out the lunge-stance twist video here.


By integrating these seven tips, along with the typical training advice for climbing Kilimanjaro, you’ll improve your fitness level and be better prepared for this challenging trek!

If you have specific questions or want to chat about your specific situation, set up a free 30-minute consultation.

Learn more about personal training + adventure coaching packages to help you prepare for climbing Kilimanjaro or other adventures.

How to Get Fit for the Inca Trail

How to Get Fit for the Inca Trail

It’s a classic bucket-list hike. The Inca Trail trek to Machu Picchu ranks high on many lists, and I know first-hand why. In 2013 my husband and I hiked the popular 4-day route and joined the throngs of humanity at the ancient ruins.

We had an amazing experience. In fact, it’s one of the experiences that inspired me to channel my personal training and coaching expertise  on training people to get fit for the Inca Trail and other adventures!

Among the amazing things about the Inca Trail is it’s an achievable goal for most people, with some training. It doesn’t require expensive equipment or special skills. All you really need are decent hiking shoes or boots, a backpack, and clothes for various weather conditions. I also highly recommend trekking poles – more about that later.

That doesn’t mean it’s easy, though. It is physically challenging. I’ve seen some comments on Facebook groups and Google reviews from people who say they “didn’t train” for the Inca Trail. I wonder what they really mean when they say that? Maybe their “normal life” includes hiking 3-4 days in a row, with 2,000+ feet of elevation gain and loss, at high altitude? Or by “ not training” they mean they didn’t run laps around a track or spend hours in the gym?

My husband and I live in Colorado, and let me assure you, we had an Inca Trail training plan! At the time, our normal weekly activities included hiking 5-8 miles with about 1,000-2,000 feet of elevation change. Yet we knew that wasn’t enough for us to really enjoy the trek.

Since then, I’ve learned a LOT about creating effective training plans for multi-day hiking trips like hiking the Inca Trail. Want to learn more about training for a multi-day hike? Watch my webinar “How to Train for Your First Multi-day Hiking Trip.”

As a certified personal trainer and adventure coach, here are the key components I include in training plans for hiking the Inca Trail. My adventure coaching clients have come back from Peru with smiles and stories of enjoying it more than they had imagined!

Training Hikes – Elevated 

Every Inca Trail training plan you find online includes variations of how far and how many days a week to hike. Of course, this pretty much goes without saying!

For my clients, I set up a customized plan based on their fitness level. I use their current walking or hiking volume, then add 10-20% more distance each week.

As their trip gets closer, the training program adds more hills and specific elevation gain and loss goals. The elevation changes are key because that’s what prepares your body and legs for the reality of the Andes Mountains!

For example, 4 weeks before my client leaves for Peru, I may recommend that she does a hike that’s 7-9 miles long with 2,000 feet of elevation change (up and down), plus 3 other walks or hikes that are 4-5 miles long with hills. For some clients who live in flat areas (Kansas, Florida, my childhood home in Michigan), that may mean finding the one nearby hill of 100 feet and doing laps!

Here’s a sample plan for hiking/walking for the first 4 weeks of training. This assumes the person normally walks 3 miles a couple of days a week, and goes for a 4-5 mile hike once per weekend:

Week 1: 3 walks for 3-4 miles, 1 hike for 4-6 miles

Week 2: 3 walks for 3-4 miles, 1 hike for 5-7 miles with 500 feet of elevation change

Week 3: 3 walks for 3-4 miles, 1 hike for 6-8 miles with 500 feet of elevation change

Week 4: 3 walks for 3-4 miles, 1 hike for 6-8 miles with 750-1,000 feet of elevation change

Because of the constant up-and-down of the Inca Trail, I strongly suggest using trekking poles for several reasons. And I also suggest using them on hikes for several weeks before the trip for those who are new users.

The other components to add as the trip gets closer is a fully loaded backpack and the hiking boots you’ll be wearing on the trip. At about 8 weeks before the trip, I advise clients to start adding a bit more weight to their basic daypack. By 4 weeks out, it should include everything they’ll be carrying on the trip.

Preparing for the Famous Inca Trail Stairs!

One of the most memorable parts of the Inca Trail for me was definitely the “original Stairmaster” in the Andes! Wowza, those people liked their stone stairs!

After I got over marveling about the amount of labor it must have taken to build mile after mile of stone stairs, I was very glad I had done some stair climbing in my office building. (I was still in my corporate job back then.)

I advise my clients to find at least one set of stairs, and become friends with it. Dial up some podcasts, audio books, music, whatever will keep you going up and DOWN the stairs. I also recommend that clients walk up and down the steps sideways – facing the railing. This works the hip flexors a bit differently, and strengthens them.

Sometimes clients ask if using a Stairmaster at the gym is okay. Occasionally, yes it’s fine. But I urge them to use real stairs at least 1-2 times per week to build up their capacity for the downhill.

Here’s a sample of the stair plan:

Week 1: 2 sessions of stairs, 40 up and down, 20 sideways up and down per side

Week 2: 2 sessions of stairs, 50 up and down, 25 sideways up and down per side

Week 3: 2 sessions of stairs, 60 up and down, 30 sideways up and down per side

Week 4: 2 sessions of stairs, 70 up and down, 35 sideways up and down per side

If my client lives in the flatlands, I’ll suggest doing 1-2 more sets of stairs per week.

As the trip gets closer, I recommend wearing a full backpack for stair sessions.


Including Strength, Balance and Mobility in Training

For years I was a cardio queen who rarely lifted weights or did much stretching. I’d rather be outside, exploring in the fresh air. I thought lifting dumb bells was for dummies – those guys who wanted to spend hours to have 6-pack abs.

When I studied for my personal training certification, I learned so much about the value of strength training. Especially how it could help me do all the things I love better and longer.

Now I know that strength training can actually improve muscle endurance, and reduce the risk of injury. This is especially important on a multi-day hike, where if you get too tired or injured you get carried out on a mule! Um, yeah, I’ll spend some time lifting dumb bells to avoid THAT!

Check out How to Train for a Multi-day Hike for my suggestions on building overall strength, a simple balance challenge, and mobility tips.

Training for High Altitude on the Inca Trail

The Classic Inca Trail tops out at 13,828 feet (4,215 meters) above sea level. The increasingly popular Salkantay Trek route reaches a breathtaking 15,190 feet (4,630 meters) altitude. Machu Picchu is at 7,972 feet (2,430 meters) above sea level, so even just walking around the ruins can be taxing.

I’m often asked how to prepare for high altitude and avoid altitude sickness – especially from people who live at or near sea level.

I had a great conversation about this topic with my friend Kit Parks on her Active Travel Adventures podcast.

From a training perspective, I recommend preparing your lungs and heart by increasing your heart rate through cardio exercises. This may include occasional high intensity intervals, though check with your doctor before adding these to your workouts.

Some people recommend certain types of breathwork to prepare for the lower concentration of oxygen in the air. I don’t have direct experience with that, though.

What I do recommend, based on lots of scientific evidence, is arriving at a higher altitude location several days before your trek.  This allows your body to acclimate. Technically this isn’t training, but it is important.

Cusco (the arrival point for most people who are hiking the Inca Trail) is at 11,152 feet (3399 meters). This is higher than the starting point for the Inca Trail. In fact, it’s higher than any town in the continental US!

Strolling around Cusco, checking out the historical sites and Peruvian crafts, is one of the best ways to acclimate for the trek. Drink plenty of water and tea – but avoid the Pisco Sours until the end of the trip, as alcohol can have a negative impact on red blood cell production.  You want all the red blood cells you can get at high altitude!

When to Start Training for the Inca Trail

This is another question I often get when travel talk turns to Machu Picchu: when should you start training?

The short answer is, it depends. The main factors are

  1. how much physical activity you’re currently doing
  2. how your itinerary is set up (number of days and mileage + elevation change per day)
  3. how much time you have to train

For the Inca Trail, someone who is not very active may benefit from 6+ months of training. Someone who is hiking regularly may get by with focusing on the activities in this post for 3 months.

If you’ve had an injury, such as a torn ACL or severe ankle sprain, you may want to allow for an even longer lead time. Definitely check in with your doctor, and even your physical therapist, to figure out what’s realistic.

Hiking the Inca Trail is an incredible experience. If you’re going to invest the time and money in flying to Peru and going on this epic trek, why not invest in getting yourself ready to really enjoy it?

To learn more about getting a customized training plan and ongoing coaching support for the Inca Trail, set up a 30-minute free consultation call.

Not Sure if You’re Ready for Adventure? Consult a Trainer

Not Sure if You’re Ready for Adventure? Consult a Trainer

, You’ve been dreaming about going on an adventure trip for years. As you space out during another boring meeting and scroll through Instagram, certain images catch your attention: jagged peaks surrounding an impossibly blue lake … ancient ruins in the midst of a jungle with vibrant birds and flowers … hills covered in vineyards with red-tile-roofed villas dotting the countryside.


Then the nagging doubts creep in. I haven’t done anything like that before. It’s been a long time since I’ve done something that strenuous. Can I actually hike in those mountains? Will I be able to keep up with the group if I go on that trekking trip or bicycle tour?

Whether it’s walking the Camino de Santiago, hiking the Inca Trail to Machu Picchu, climbing Kilimanjaro, bicycling in Italy or Croatia, or whatever your bucket list adventure is, with some pre-trip preparation, you CAN do it!

As a personal trainer and adventure coach, I help clients prepare physically and mentally so they feel strong and confident when they go on their dream trips. We collaborate to create a realistic and achievable plan, with guidance and support over the weeks or months leading up to the adventure.

Here’s how it works.

1: Increase Your Strength and Stamina

By their nature, adventure trips include a lot of interesting, and some challenging, experiences. Most of us don’t have the time in our “normal” lives to spend several hours a day walking, hiking or bicycling like you’ll be doing on the trip.

What you need is a training plan to help you improve your endurance and strength before you go. Then you’ll be ready to crush it when you get there!

I’ll use my personal training and adventure travel background to design a plan that fits into your life and prepares you for your adventures, such as hiking at high altitude, a cycling tour, or a multi-day walking tour. We’ll collaborate on what works well for you, and the strengths you can build on. You’ll find the energy and motivation to keep going farther.

As you try new things in the comfort of familiar surroundings, I’ll support you through the process. 

After a few weeks, you’ll look back at your progress and get even more excited for what’s to come!

To learn more about how I approach building stamina, watch my webinar  “Increasing Stamina and Endurance to Have Energy at the End of an Adventure Day.”

Here’s how one of my client puts it: I feel like my walk along the Cinque Terra would have been much harder without the training I’ve had with Becki. I am stronger. I am more fit than I’ve been in years! – Julie M.

2: Stay on Track and Motivated

We all know the old saying, the best laid plans of mice and men often go awry. We have good intentions to get fit for a trip, but then there are the detours, delays and distractions that derail us.

As your adventure trainer and coach, I’ll help you navigate alternate routes as needed. You may go through one or several of the 5 mental stages of preparing for a challenge. We’ll explore what helps keep you motivated. And you’ll get extra support to stay on track and accountable.

You never know what is going to come up before your trip, but you will know you have someone to keep you moving forward.

Here’s what another client says: I appreciated the combination of accountability and challenge! – Carly O.

3: Improve Your Confidence and Comfort

On my first call with clients, some tell me they’re excited about the trip yet they are a bit terrified. It’s time to take on that little voice that’s saying “Can I really do all of this?”

I’ll remind you of all the reasons to respond to the voice, “Yes, I CAN do this!” The reasons will come from the successes you’ve had and what you’ve learned during your weeks of training for your adventure.

When you show up at the start of the trip, you’ll be confident that you’re going to have an amazing time. You’ll be comfortable with the activities because you’ve been doing them. You’ll be able to focus on the new places you’re exploring and the memories you’re making.

What may surprise you is how this experience transforms how you think about other parts of your life, and what you do in the future! More adventures seem possible, life changes seem manageable, and opportunities seem to multiply.

Another client commented: The coaching plan and coaching sessions gave me confidence that I am preparing for my hike and will be able to complete and enjoy it. Peggy L.

Learn more about training for adventure travel on the Active Travel Adventures podcast episode I joined with Kit Parks.

Want to talk about how this could work for you and your plans? Set up a free 30-minute consultation!


How to Train for a Multi-day Hiking Trip

How to Train for a Multi-day Hiking Trip

As the pandemic “travel hold” eases up, I’ve had several clients who are training for a multi-day hiking or walking Bucket List trips. So I gathered my advice for how to train for a multi-day hiking trip to share with you!

 Check out my WEBINAR on this topic: replay available here!

Does your Bucket List include at least one multi-day hike or trek? Maybe the Camino de Santiago, which I did in May 2022. Hiking in the Alps has been on my list since watching the Sound of Music as a kid – which I did September 2022!

Or are you aiming to do one of the treks to Machu Picchu – my husband and I completed the “Classic” 4-day version in 2013 . Perhaps you’re intrigued by one of the newer options, like the Camino de Costa Rica?

Training for a multi-day hiking trip should involve more than just walking and hiking to prepare. If you want to make the most of this type of trip, here’s how to get started and gain momentum toward your goal!


Getting (Re)Started Hiking

Whether it’s been months or years since you’ve hiked regularly, or even if you’ve never really hiked, you can do a multi-day trek if you have the time and the motivation.

If the multi-day hiking trip you want to do is more than 3 days and more than 20 miles total, and you’re not hiking or walking regularly now, you should start training at least 3 months before the trip.

The key is to start small and slow, then increase your activity gradually. If you’ve been less mobile because of an illness or injury, check out my webinar on “Returning to Exercise After and Injury” or see this post on 5 focus areas for a post-injury hiking trip.

Look for short hikes in your area, and start with what feels doable for you. Then add about 10-20% to your total distance or time each week as you get more comfortable. You can use a pedometer app on your phone or a fitness tracker/watch to gauge the distance.

Sites like AllTrails and apps like Hiking Project are helpful for finding hikes. They show detailed information about the distance and elevation change of the trails, plus reviews from hikers.

Another great resource is your local parks and recreation department. Or stop by a store that sells outdoor clothing and gear and ask one of the employees.


Using Stairs to Train for Hiking

As you do more hiking, your large leg muscles – quadriceps, hamstrings and calves – will get stronger. That said, when you’re training for a multi-day hiking trip, doing specific strength-building exercises with your legs will help you be more stable and less tired on longer hikes.

One simple and effective exercise is step-ups, which are exactly what they sound like: stepping up on stairs or a bench. You can start with a single step, then use a longer staircase to go up and down – actually, the down is as important as the up.

Also step up sideways – that strengthens the muscles that will help you be more stable on uneven terrain when you’re hiking.

If you don’t take stairs much currently, here’s a good starting point:

  • 40 steps up and down on each leg
  • 20 side steps up on each leg
  • At least two times per week
  • Add 5-10 steps up and down, and 2-5 side steps on each leg, each week

After a couple of weeks, get your backpack, put some weight in it, and climb stairs wearing it.

If your multi-day hike includes steep sections, work up to taking the steps two at a time up and down.


Strength Training for Hiking

Incorporating strength training as you’re preparing for a multi-day hiking trip will pay off with increased endurance and reduced risk of injury. 

If you haven’t done much strength training in the past, learn more about it on my webinar “Building Strength for Your Upcoming Adventure.”

Exercises for Core Strength

As you hike, especially with a backpack, you’ll be twisting and leaning as you navigate uneven terrain. The muscles in your abs and back are key to keeping you stable and upright.

Holding a plank position is a popular way to build core strength. You can start by doing a plank against a wall, then on the floor with your knees on the ground, and work your way up to being on forearms and toes.

Hold the plank with good form for as long as you can, then add a few more seconds each time to get to 1 minute. Remember to keep your abdominal muscles tight and tailbone tucked, don’t let your lower back arch.

Strengthening your oblique muscles will help as you bend and twist when you’re hiking on uneven ground. They’re also used as you’re putting on and taking off a backpack.

One way to improve your obliques is side twists. Sit in a chair and hold a weight in front of you with your upper arms at your sides and elbows bent at 90 degrees. Turn your torso at your waist as if you were going to pass the weight to someone next to you, then turn back to the middle, and then turn to the other side.

Core workout:

  • Plank for 30-60 seconds, at least once a day
  • Side twists – start with 10 per side once a day, add 2-5 more per side per week (check out this video of doing them using a backpack)

Exercises for Upper Body Strength

Although you may be tempted to focus just on your legs and core, don’t neglect your upper body. Strengthening your chest, back and shoulders will help you be more comfortable holding the additional weight of your pack. Plus you’ll use your biceps and triceps to lift the pack.

If you use trekking poles, which I highly recommend, a stronger upper body will help you use them to take pressure off your hips and knees.

The classic exercise for building upper body strength is good old-fashioned pushups. As with plank, you can start with doing pushups against the wall. Then move to the floor with your knees on the ground and do as many as you can. As you get stronger, lift one knee and then both knees so you’re on your hands and toes as you lower your chest to the ground and then push up.

You can also use your backpack to strengthen your arms and back. Put in a few soup cans or bottles of water to start. Bend your knees, keep your chest up and grab the top of the shoulder straps. As you stand, lift the pack up in front of you to about chest height, then lower it back down to the ground.

You should have enough weight in the pack that your arms get tired after 10-15 lifts. If you are comfortable lifting it 15 times, add 2-3 more cans or bottles the next time. Keep adding more weight until you get to the point where your arms are tired after 10 lifts.

Upper body workout:

  • Pushups – 10-15 at least 2x per week
  • Pack lifts – 10-15 at least 2x per week (check out this video of pack lifts)


Improving Your Balance for Hiking

Better balance reduces your risk of injury while hiking. By practicing balance regularly, you’ll be better equipped to deal with uneven ground and unexpected movements, like a rock shifting under your boot.

Balance exercises help you build the smaller muscles and tendons that surround and stabilize your larger muscles and joints.

A simple way to improve balance is to stand on one foot on various surfaces – carpet, concrete, grass, dirt, gravel, rocks. Also do this on a hill – facing uphill and downhill. Aim for 30 seconds per leg to start and work up to 60 seconds. Notice which foot or side feels more stable. Then put on your pack and do it.

Add time to your balance routine gradually. Spend extra time practicing balance on your weaker side.

Focus on Flexibility for Hiking

Finally, don’t forget about flexibility. When you’re more flexible, it’s easier to reach that awkward step or hand hold as you navigate more challenging terrain. And you’re less likely to strain your muscles along the way.

At a minimum, stretch for 5 minutes after a hike or strength workout. Hold each position for about 30 seconds.

Yoga and Pilates help with both flexibility and balance, plus many of the common moves in these practices strengthen and tone muscles. Adding at least one session per week will help you work out the kinks from your increased activities. Find a studio with qualified instructors, especially if you’re new to these practices.

Sample Hiking Training Program (PDF) 

One of the basic principles for training is to add more effort gradually – about 10-20% additional per week. For hiking, additional effort can mean more miles and/or steeper hills, and/or a heavier pack. For strength training, additional effort can be a combination of more repetitions or time, and additional weight.

Click here to download a PDF of the first 6 weeks of a plan for a person who is generally healthy, though not exercising regularly, who wants to complete a 3-day, 20-mile inn-to-inn hike carrying a day pack with moderate elevation changes (no more than 1,000 feet per day).

If you’re interested in a customized plan and coaching, check out my Adventure Coaching packages, or set up a free 30-minute consultation call.

Multi-tasking and Mindset Tips!

If training for a multi-day hike sounds like a lot to add into your already busy life, find creative strategies for multi-tasking!

  • Practice balance by standing on one foot while you’re brushing your teeth.
  • Hold a plank while you’re watching your favorite show or reading a book.
  • Take the stairs instead of the elevator at the office or while doing errands.
  • Take your dog for an extra-long walk or two. If you don’t have a dog, walk a neighbor’s pup.

If you’re struggling with confidence, try these mindset strategies.

And remember to take it one step at a time – literally and figuratively!